
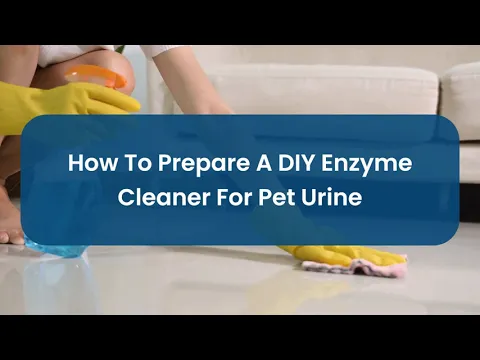
How To Prepare A DIY Enzyme Cleaner For Pet Urine
Pet urine stains are a common challenge in homes with furry companions. These unexpected accidents not only leave behind visible marks but also create strong smells that linger for days. While store bought products claim to fix the problem, many are filled with chemicals or offer only short term relief. A more natural and cost effective option is preparing a DIY enzyme cleaner at home.
This homemade solution uses simple kitchen ingredients and works effectively on both stains and odours. It is especially useful for renters who want to maintain a clean environment without incurring excessive costs on cleaning products. This guide explains how to prepare an effective DIY enzyme cleaner using readily available ingredients. Learning to make this cleaner is easy, and once ready, it can become a long term cleaning companion for pet owners.
1. Why Use Enzyme Cleaners for Pet Urine?
Pet urine contains ammonia, and uric acid, which tend to penetrate and damage a variety of delicate surfaces and fabrics. While you can buy cleaners that claim to remove odours, they mostly only disinfect the surface or mask the smell temporarily – they don’t penetrate deep enough to eliminate the source of the smell. This is where enzyme cleaners come into play.
Enzyme cleaners break down the organic matter found in urine. They attack the molecules responsible for strong smells and help remove stains completely. Over time, this helps prevent pets from returning to the same spot and repeating the behaviour.
In rental homes, using a natural cleaner is a smart option. It keeps the space fresh and reduces the risk of property damage. This is particularly useful for renters to consider when preparing for a professional end of lease cleaning Canberra. A clean home means fewer issues during the inspection process and improves the chances of getting the full bond back.
2. Products to Use When Making DIY Enzyme Cleaner
Making an enzyme cleaner at home requires just a few basic ingredients. These are safe, easy to find, and suitable for regular use around pets. The goal is to create a natural fermentation process that produces effective cleaning enzymes.
Essential items include:
- Citrus peels: Use lemon, orange, or lime peels for their natural oils and fresh scent. These peels also contain citric acid, which helps break down grime and adds a pleasant fragrance to the final product.
- Brown sugar or jaggery: Acts as food for the beneficial bacteria during fermentation. The sugars are consumed by microbes, triggering the fermentation that creates natural cleaning enzymes.
- Warm water: Speeds up the fermentation process by creating a suitable environment for bacteria to grow. Avoid boiling water, as it may kill essential microbes.
- Plastic bottle: A sturdy plastic bottle is ideal for holding the mixture as it ferments. It can expand slightly if gas builds up, unlike glass, which may crack or burst under pressure.
- Strainer or muslin cloth: Used after fermentation to filter out solid particles, such as citrus pulp and peel. This step ensures the final liquid is smooth and easy to use for house cleaning
These ingredients combine to create a powerful, natural cleaner. The final liquid is both effective and eco friendly. It also helps maintain the property during reliable end of lease cleaning Canberra routines.
3. How to Prepare a DIY Enzyme Cleaner

The cleaner is made by fermenting fruit peels, sugar, and water for a period of three months. The natural bacteria produced during this time create the enzymes necessary to break down urine.
To begin, place one cup of citrus peels into a large plastic container. Add half a cup of brown sugar or jaggery. Then pour in four cups of warm water. Close the lid tightly and shake the bottle vigorously to mix all the ingredients thoroughly.
During the first week, the mixture will release gas as it ferments. It is important to open the cap once daily for a few seconds to release pressure. After that, let the bottle sit in a cool, dark area for about three months.
Once fermentation is complete, strain the liquid using a clean cloth or filter. Pour the enzyme rich liquid into a spray bottle for regular use. This powerful homemade solution can help maintain surfaces during basic cleaning, reduce allergens, and support a smooth transition during professional end of lease cleaning Canberra procedures.
4. Things to Keep in Mind While Making the Cleaner
A few simple precautions can improve the result. Always use a plastic container, not a glass one. During fermentation, pressure builds up, and glass containers can crack or burst. However, plastic containers are safer and more flexible.
Avoid opening the bottle too frequently. Once daily is enough to release pressure. Do not shake the bottle after the first week. Let the mixture settle and ferment undisturbed for the remainder of the time.
Store the plastic container in a location that is out of direct sunlight and away from heat sources. This allows the bacteria to grow properly and ensures that the enzymes are active. Once the cleaner is ready, store it in a spray bottle and shake before each use.
It is also helpful to label the bottle with the start date. This makes it easier to track the three month fermentation period.
For renters handling trusted end of lease cleaning Canberra requirements, being prepared with such natural solutions is helpful. It adds a responsible touch to the overall cleaning routine.
Application Tips:
- Spray generously on the stained area.
- Let it sit for 10-15 minutes.
- Blot the area with a clean towel.
- Repeat if the odour remains.
5. Maintenance of DIY Cleaner
The DIY cleaner can last for several months if stored properly. Use a dark glass bottle or an opaque spray container. Keep it away from direct sunlight and heat. This helps maintain the enzymes’ effectiveness.
Shake the bottle before every use. Sediments may settle to the bottom, which is a normal process. If the cleaner smells off or has mould, discard it and prepare a fresh batch. A well maintained bottle becomes a reliable part of everyday cleaning routines. It is a cost effective option for regular home use and especially valuable for renters.
Cleaning hacks like these offer a budget friendly solution. They also reflect a responsible approach to lease cleaning tasks during the final inspection by the landlord.
A Guide to Preparing a DIY Enzyme Cleaner For Pet Urine

Wrapping Up
Using a DIY enzyme based cleaner is a smart and inexpensive way to address pet urine stains. It primarily uses modest items commonly found in kitchens, and a non-toxic solution can be mixed up and stored for a long time, but with patience, it will become a dependable cleaner for everyday messes. Cleanliness and freshness are vital to tenants. Regular cleaning and treatment can help maintain a fresh, inviting, and livable environment.