Patios make a significant difference in your home’s visual appeal. You would like them to stay nice and clean so that they do not impact the overall look of your home. Although pavers are known to be quite durable and reliable, they are still likely to get a bit scruffy due to fun barbecues and weather conditions.
If you miss the days when your patio used to sparkle, do not worry because cleaning pavers is not the toughest task. Firstly, if you maintain your pavers, cleaning them will be easier and less time-consuming.
In addition, regular cleaning and maintenance help you save money because you will not have to restore or replace them. Thorough cleaning of the pavers can boost the entire vibe of your outdoor space. Professionals use tried and tested methods to clean the pavers for the
best end of lease cleaning Canberra.
It will be easier for you to complete the task if you do the same.
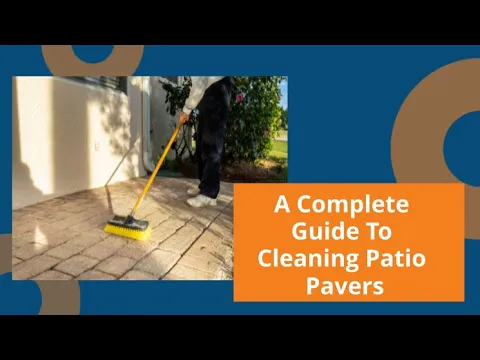
Here is the complete guide to cleaning patio pavers. Follow these steps for the best possible results.
1. Pick the Ideal Weather
It is better to only clean and seal the pavers when the temperature is anywhere between 10 to 30 degrees Celsius. If it is colder than that, the cleaning solution and sealer won’t do their job properly. You should also look to avoid cleaning and sealing the pavers during the rainy season. Find a date on the calendar when the temperature will be around the recommendations to ensure the ideal results.
2. Remove the Loose Dirt
There is no doubt that over time, branches, dirt, and leaves can pile up on the pavers. Expert bond cleaners Canberra recommend removing them before starting the cleaning work.
Utilise a tool like an outdoor broom to eliminate dirt and debris, and follow up with rinsing through a garden hose. If your concrete pavers are already in good condition, a sweep and rinse will be enough to prepare them for the steps to follow.
3. Pressure Wash for a Thorough Clean
If you can spot stains, oils, or efflorescence build-up on your pavers, a pressure washer will be ideal to eliminate them. A pressure washer will also be helpful for flushing out weeds that are likely to be caught between the pavers. Eliminating weeds using this tool can prove to be a great time saver in comparison to pulling them out with your hands.
Remember to wear
personal protective equipment, such as safety glasses, during the process in case small rocks or sand fly into the air. Do not focus on one spot for too long, as pressure washing for an extended period can damage the pavers’ finish. After the procedure is completed, let the sand and stone dry overnight.
4. Fix the Paver Problems
Once you have used a
pressure washer, it is the perfect time to deal with any common problems. You can simply replace the bricks or stones. If the pavers are cracked or chipped, you will need to replace them separately. For levelling them, remove the paver by prying it up using a screwdriver or wrecking bar. Compress the present dirt beneath and follow up with adding polymeric sand or paver base.
Be sure to press down the latest material before replacing the stone. Figure out if the pavers are flush. You can do so by using a level. Keep adding more sand underneath the stone till the area is level. Professional end of lease cleaners Canberra recommend fixing the problems during this stage before moving ahead.
5. Prepare an Effective Cleaner
Prepare a cleaner that tackles the key problems,
such as rust, oil, or efflorescence. You have the option of making an effective cleaning solution by mixing mild dish soap and water in a 1:5 ratio.
Alternatively, white vinegar and water in a 1:4 ratio work best for cleaning and eliminating most issues. Professionals use such cleaners to ensure the best bond cleaning Canberra. Try to avoid darker vinegar because it can colour your pavers. Once the cleaning solution is ready, follow these steps:
Use a pump sprayer or an outdoor broom to spread the solution across the pavers.
Allow the solution to sit there for 15 to 60 minutes.
For scrubbing, use a soft-bristled brush on the tough spots.
Finally, rinse the entire surface with clean water.
6. Apply a Sealant
If you want to prolong the life of your patio pavers, it is a must to apply a paver sealant. A sealant provides sufficient protection, minimising the chances of any issues. It stops grass and
weeds from making their way between the pavers. Use a pump sprayer or roller to apply the sealer and ensure even coverage across the patio.
It is more than possible that you will need to wait for anywhere between one to three hours before applying a second coat. You can also hire professionals who offer maintenance services. They will effectively inspect and clean your pavers.
Wrapping Up
Maintaining and cleaning your patio pavers is not a difficult task. You just need to make use of the right approach just like professionals. By following the steps mentioned in this article, you will have an easier time cleaning your patio pavers.